Raspberry Pi network audio

I have Raspberry Pi hooked up on TV with 2.1 speakers. When I’m on sofa with my notebook, I had to disconnect the audio cable and pull it across the room if I wanted to listen some music on the speakers. I got so agitated I developed a small solution for network audio transmission. In my case this is done from my notebook via Wi-Fi to Raspberry Pi and to speakers.

Application desired functionality:

  • transmit audio over wireless network
  • one click to enable or disable transmission
  • mute the local speakers after enabling the transmission
  • capture and transmit all audio on client (even system sounds) without modifying existing applications
  • volume control on client
  • server must run on low powered devices (Raspberry Pi)

Technology:

  • client should be written in C# .NET, because Windows are my primary OS on notebook
  • server should be written in Java, because it will run basically everywhere
  • transmission protocol will be TCP, because it simplify some implementations. UDP is better and is should be used for low latency application

Server

Server (source) is written in Java. It listens on TCP port, waiting for clients. When client connects, server creates a buffer and fill it with audio stream. This causes a delay in audio playback, but it helps smoothing out the delay that happens due to wireless network latency and gives a client a little more time to send data. It works fine for listening music, but for movies or games we need to develop low latency solution with UDP and a very small buffer (future work). After we fill the buffer on the server, we drain it to audio line. Installation of server is simple. You need to install java and place the server in any directory. Then you can run it with

java -jar PIAudioServer.jar --port 10000 --prebuffer 1000

–prebuffer is the time used for the buffer in milliseconds (I use 1 second, but you can go lower)

Note about Raspberry Pi: you have to enable audio jack if you want to use it. Here is my initialization script:

#!/bin/sh
#

modprobe snd-bcm2835
amixer cset numid=3 1 # install alsa-utils for this

Client

Client (source code) is written in C# .NET. On windows we can create software audio loopback, just like connecting audio cable from audio out to microphone in. This is done with WASAPI. We can use WasapiLoopbackCapture which is found inside NAudio library. It provides an uncompressed stream of audio in sampling rate of 48.000 Hz and 32 bit depth. Before we can send the stream to the server on Raspberry Pi, we need to process it by reducing bit depth to 16 bit and including the volume.

float sample32 = BitConverter.ToSingle(e.Buffer, index);
short sample16 = (short) (sample32 * (32768f * (volume / 100f)));

I have included system tray icon in the client. It shows red icon when client is disabled and green icon when we enable it. It also provides volume control with double click. After we enable the client, it automatically mute all audio on local speakers and redirect it to the server. This is also done with NAudio library.

private static void setMute(Boolean value)
{
        MMDeviceEnumerator devEnum = new MMDeviceEnumerator();
        MMDevice defaultDevice = devEnum.GetDefaultAudioEndpoint(DataFlow.Render, Role.Multimedia);
        defaultDevice.AudioEndpointVolume.Mute = value;
}

You must define server IP address and port when running the client. This is done with command line arguments –port and –ip. Installation of the client is simple. Copy executable with naudio.dll anywhere on your computer and place a shortcut with port and ip in windows startup folder. If you have any problems, check out this screenshot.

Developer’s notes:

  • never create arrays on the fly in work intensive parts of the code. Allocate them and reuse them in every iteration. Array allocation will give you random delay which causes problems with audio and it’s hard to debug

Future work:

  • modify server and client for low latency audio (UDP, smaller buffer)

Attachments:


or bitcoin donation: 1AZpTrJbUNHGSaXfG1AwzCxSRRTZGEJQck

Share Button

Backup with DAR and rsync

I’m dealing with terabytes of data on multiple servers that needs to be backup on a weekly basis. First solution was to compress all the data and transfer it via FTP on remote backup server. This is huge waste of resources as 90+% of data doesn’t change between two backups. I thought about rsync, which is great for minimizing bandwidth usage, because it only transfer parts of the file that changed. Main problem with rsync is, that it doesn’t compress the data. Storage required for backup is 1:1 which can be a waste of resources. We can compress the data with gzip, rar, …, but we would make a big mistake. DAR is the answer.

Application desired functionality:

  • scheduled backups (e.g. once per week)
  • files and MySQL database
  • minimal bandwidth: transfer only changed data
  • minimal backup size: compression

Why we want to use DAR over gzip or something similar? Let assume we have 1.000 files and we change only couple of them. Compression algorithms would normally create compressed file which would differ a lot from the compressed file before the change. This is bad news for rsync as it has to transfer all that changed data to backup server. DAR has solution for this problem. It compress and catalogs every file individually in DAR archive. There is some overhead but it’s minimal. However only parts of the archive that contain changed files will be different from previous archive, which means less work for rsync and a lot less used bandwidth. We can also use Parchive with DAR for error correction. This is optional but it provides additional data redundancy for correcting damaged archives.

Application

I wrote a small script in BASH. I’m not a BASH programmer. If you can improve the scripting, please do so. You can download it here.

Before you can run it, you have to edit conf file. Inside you will find options like list of directories to backup with rsync, DAR + rsync, MySQL database backup and credentials for rsync server. You must setup rsync server on your backup server. It’s supported basically on every platform. After configuration you can run the backup job by running file named backup.

First it will backup MySQL database, then it will make local DAR archive of directories and finish with rsync of directories without DAR. It will create temporary archives in local folder, but after transfer it will remove them. You need a minimum free space of biggest folder you specified in DAR archive under conf file.

Required dependent applications:

Application specifications:

  • backup for files using rsync or DAR + rsync
  • MySQL backup
  • supports setting nice and ionice
  • data transfer is done to remote rsync server
  • ability to run from scheduled jobs (crontab)

Future work:

Every new backup will override previously created backup. I would like to add an option to keep N backups on backup server.

Attachments:


or bitcoin donation: 1AZpTrJbUNHGSaXfG1AwzCxSRRTZGEJQck

Share Button

Android app: Router Password Recovery

Router password recoveryTwo years ago I developed a small android project for recovering admin password on router with HTTP auth. It already had 250.000 downloads when Google decided that it was in violation with section 4.4 of the Developer Distribution Agreement. Because it’s no longer available on Google Play, I’m publishing it here with complete source code of the project.

The app should only be used on routers you own. It’s illegal to gain unauthorized access to any kind of device.

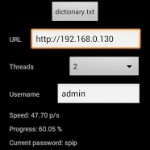
Router password recovery has two modes. You can brute force the password, or use a dictionary. Passwords length of 5 or less can be easily broken with brute force in less then a day. If you need to brake longer password, you can limit character set used in brute force or use a dictionary of most common passwords. You must provide your own dictionary in a simple text file with one password per line. You can find pre-build dictionaries online. App has ability to continue from any given password you input. This enables you to split work in multiple sessions.

Router needs to support HTTP auth. HTTPS is also supported, but slower. Routers with DD-wrt or Tomato do support this. Some routers with stock software also support it and some do not.

A lot of people have mistaken Router password recovery for a Wi-Fi hacking tool. It’s no such thing. It only helps you find lost password for router and not for Wi-Fi network. Access to Wi-Fi is a precondition to run this app.

App should be used to recover lost password, but in theory it could be used for next scenario or variations:

  1. Connect to open Wi-Fi network or secure Wi-Fi if you have required password.
  2. Recover admin password with brute force or dictionary.
  3. Do whatever you want. For example: open ports, change QOS and ultimately install your own software to intercept all traffic (tcpdump).

Router password recovery details:

  • works on Android 1.6 and greater
  • supoorts HTTP and HTTPS auth
  • multithreading (user defined: 1-4 threads)
  • brute force attack with custom character set and start password
  • dictionary attack (txt file with one password per line) with start password
  • speed indicator (passwords per second)

Images:

Brute force

Brute force

Dictionary

Dictionary

Attachments:


or bitcoin donation: 1AZpTrJbUNHGSaXfG1AwzCxSRRTZGEJQck

Share Button

MarbleScroll for Logitech Trackman Marble

Recently I bought an ergonomic mouse Logitech Trackman Marble. Mainly because I started to feel pain in my wrist and it didn’t go away over time. Probably because I spent 8+ hours per day on computer and incorrect hand positions/movement can lead to Carpal tunnel syndrome.

Trackman Marble is a great mouse. It’s symmetrical, meaning you can use it if you are left or right handed. You need couple of weeks to get used to it, but then it’s simple to use like any other mouse. I even play FPS games with no problems. The only real big downside of the mouse is, that it lacks the scrolling wheel. Logitech has provided an alternative solution for scrolling, but it’s non intuitive to use, in other words, useless.

I decided to write a small program, code name MarbleScroll, that would simulate wheel like scrolling. The main idea is scrolling with pressing the back button and turning the marble. If you don’t turn the marble, then it acts just like normal back button. After digging around I found out it can be done with capturing low level mouse events in OS. I decided to go with C#, as windows is my primary OS for workstation.

Desired MarbleScroll functionality:

  • support for scrolling in all applications without modifying them
  • back button + marble turn = scroll
  • back button = normal back operation
  • scrolling is done on application with mouse focus and without the need of clicking on application to gain focus

Solution

You can download MarbleScroll here. If you use SetPoint, you need to set Generic button as Button task for the back button (demonstration). MarbleScroll is really simple to use. You just need to run it. Place it in any folder on your hard drive and create shortcut in Startup folder for auto start at reboot. If you get an error about missing .NET framework, you can install it from here.

Few details about MarbleScroll:

  • works on Windows XP, Vista, 7, 8, 8.1, 10, …
  • build for .NET framework 4.5, but it should compile on any other if you choose it in project source
  • compiled for right handed mouse, but it works for left handed too.
  • runs in system tray where you can close it if you require to
  • vertical and horizontal scrolling with back button + marble movement
  • back button without marble movement produces normal back operation
  • scrolls the windows under mouse pointer without focusing it

Detailed solution:

In windows we can capture low level mouse events in User32.dll with SetWindowsHookEx function (WH_MOUSE_LL). We need this to detect back button press and marble movement. For simulating a scrolling wheel we can use mouse_event function (MOUSEEVENTF_WHEEL and MOUSEEVENTF_HWHEEL).

The idea behind scrolling in non focused window under mouse pointer is to find underlying window with WindowFromPoint function and compare it to focused window from GetForegroundWindow function. If they aren’t equal, we focus the underlying window with SetForegroundWindow function. If we focus it every time, scrolling won’t work in drop-down lists. That is because drop-down list is normally a child window and we are focusing the parent window. Therefore it isn’t enough to compare foreground window and window from point, but we have to compare their root owners, which can be done with GetAncestor function.

I created a MarbleScroll.cs class for scrolling and Visual Studio project which includes MarbleScroll.cs and code for background application running in system tray. You can tweak the source code for vertical and horizontal sensitivity or for general code improvement. In second case please share the code (:

Update 30.7.2015: The app didn’t work well on Windows 10. The problem was in mouse_event() taking too much time to execute inside low level hook and windows doesn’t like that. I moved the code to another thread and it works fine now. It should work better on other versions of windows too. Code and updated app is available for download in attachments.

Update 8.2.2017: It doesn’t work with task manager or your app? Try running MarbleScroll as administrator (right click, run as administrator). MarbleScroll only works for applications run by the same user.

Update 26.5.2018: If you have problems with MarbleScroll on HiDPI display, you can right-click MarbleScroll.exe and go to Properties, Compatibility Tab and select “Override high DPI scaling behavior. Scaling performed by” and select “Application”. (credits go to Simon Lang)

 Attachments:


or bitcoin donation: 1AZpTrJbUNHGSaXfG1AwzCxSRRTZGEJQck
Share Button